

How to create a custom agent
Add an agent for a kind of request the six default agents don't cover.
The six default agents cover the usual dealership appointments. A custom agent handles anything else you want the AI to treat as its own specialty — financing questions, fleet enquiries, a seasonal campaign.
Create the agent
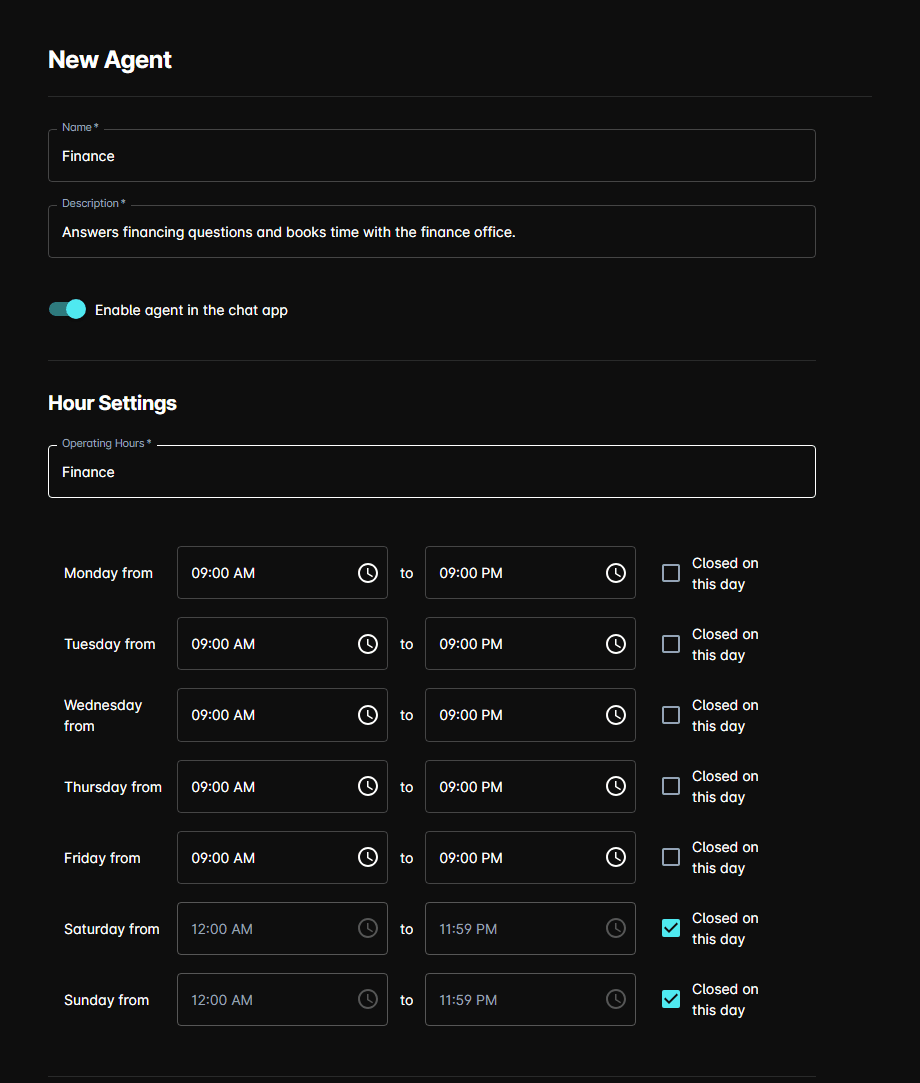
Decide whether it books
Agent can book appointments for the user works the same way it does on a default agent.
Turned on, the agent books in chat, and you get:
- Buffer Time and Buffer Time Unit — the gap left around a booking
- Information to Collect — the details the agent gathers first (see below)
Turned off, a Response Settings section appears instead, where the agent answers with a link and phone number or with a message you write.
Prioritize this agent in the bot sits alongside these and favours this agent when more than one could take the request.
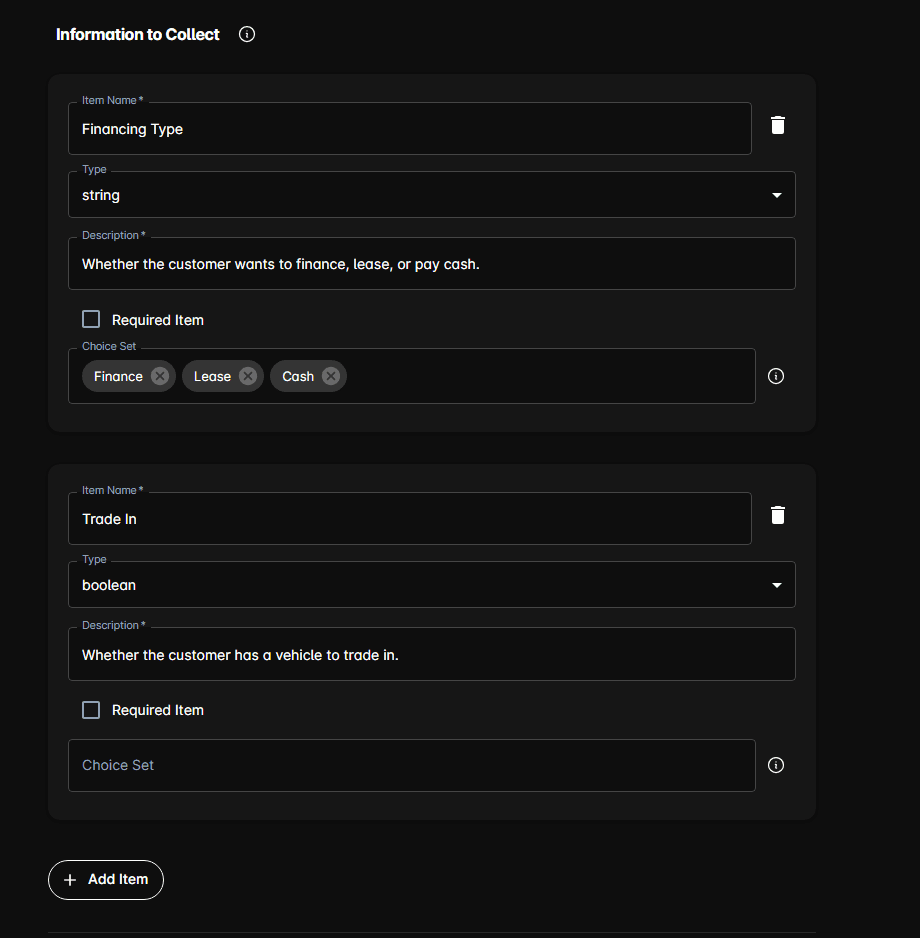
Information to Collect
Once the agent is booking, you can tell it what to find out first — a vehicle, a preferred contact time, a budget. Each detail is one item, and the AI asks for it in conversation.
Add your own instructions
Additional Info Override at the bottom works as it does on any agent — the shared common prompt is shown read-only, and Agent Specific Prompt Override adds instructions for this agent alone. See How to edit an agent prompt.
Delete a custom agent
Open the agent and click Delete at the bottom right, then confirm. The button isn't shown while you're still creating the agent.
Tips
- Give the agent one job. An agent with a broad description competes with the default agents and makes routing less predictable.
- Check the description first when conversations aren't reaching the agent — that text, not the name, is what the routing depends on.
- Write each item's description as the reason the agent needs the value, not as a restatement of its name. That's what the AI reads.
- Use a Choice Set whenever the answer should be one of a known list — it stops the AI inventing an option.
- Mark an item Required Item only when the agent genuinely can't proceed without it. Every required item is one more thing the customer has to answer before booking.
- Try it in Preview before relying on it with customers.