

Getting Started
Get your dealership up and running with DealerAI by configuring your general settings and automated outreach.
This guide covers the two most important areas to set up before you start using DealerAI: your General Settings (dealership profile, hours, and channels) and Reach (automated customer outreach). Getting these right first ensures the AI answers questions about your dealership correctly and follows up with leads automatically from day one.
Start by signing in to the DealerAI portal at https://portal.dealerai.com. See How to log in if you don't have access yet.
Use the dealership picker in the top bar to confirm you're editing the right store before you change anything. See How to switch between dealerships.
Step 1 — Configure General Settings
Navigate to Settings in the sidebar. Settings is split into tabs down the left side; the ones below matter most during setup. See the full Settings guide for a reference to every tab.
General Info
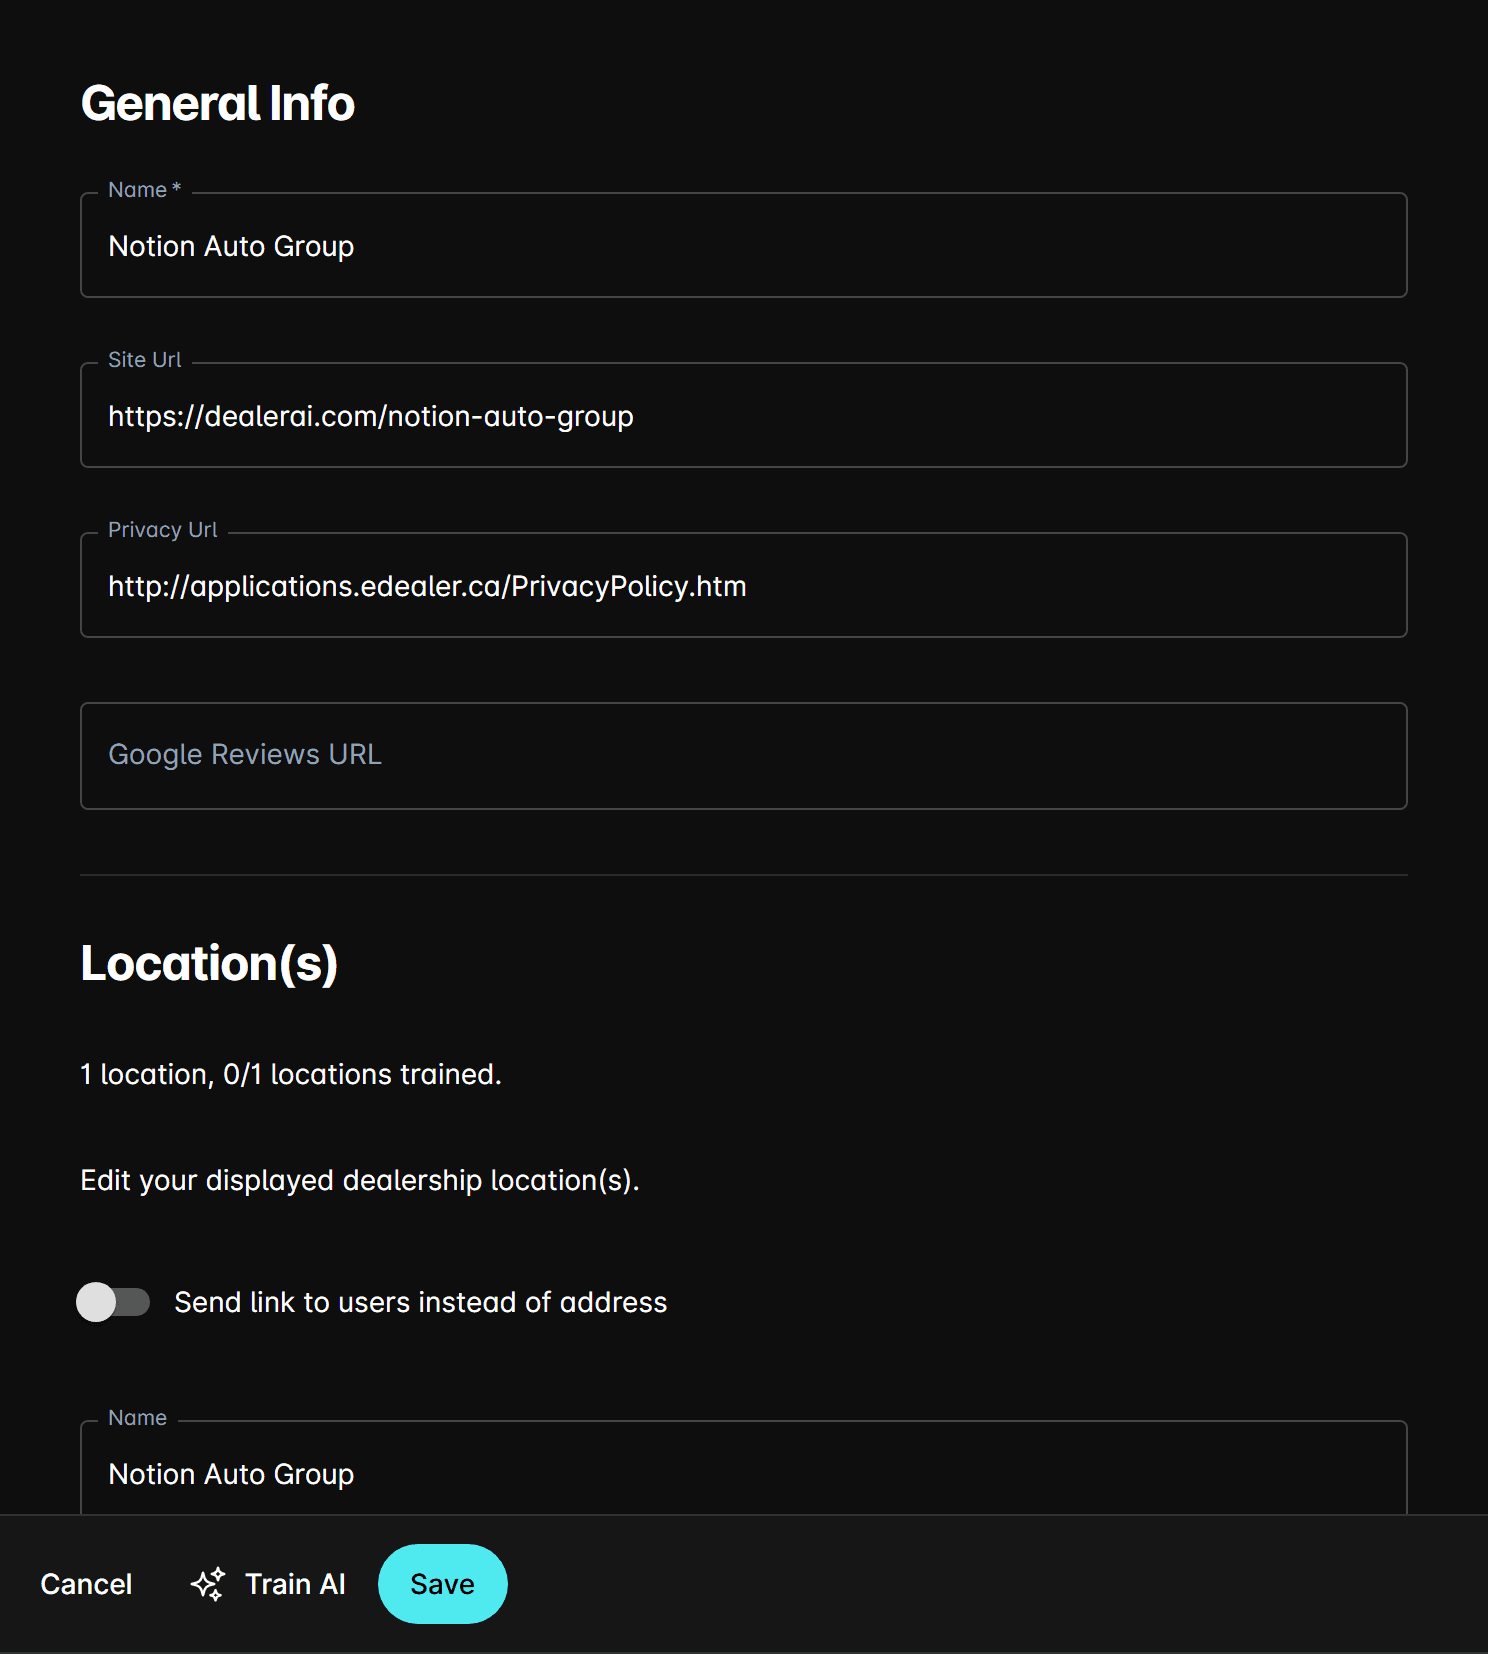
The General Info tab holds your dealership's identity and locations. The AI uses this when customers ask where you are or ask for your website.
| Field | What to enter |
|---|---|
| Name | The dealership name as you want it spoken to customers |
| Site Url | Your main dealership website |
| Privacy Url | Link to your privacy policy |
| Google Reviews URL | Used when the AI points customers at your reviews |
Below those, add each physical store under Location(s). Click Add Another Location for more than one:
| Field | Notes |
|---|---|
| Full Address | The complete address as customers would search for it |
| Address Line 1 / 2, City/County, Province/State, Postal Code/Zip, Country | The address broken into parts |
| Neighborhood, Nearest Intersection | Helps the AI answer "where exactly are you?" naturally |
| Latitude, Longitude | Used for proximity search |
| Department | Which departments operate from this location |
| Google Map URL | Generated for you from the address |
There's also a Send link to users instead of address toggle if you'd rather the AI share a maps link than read out the address.
After changing dealership details, click Train AI so the assistant picks up the new information. The button shows how many locations have been trained.
Hours
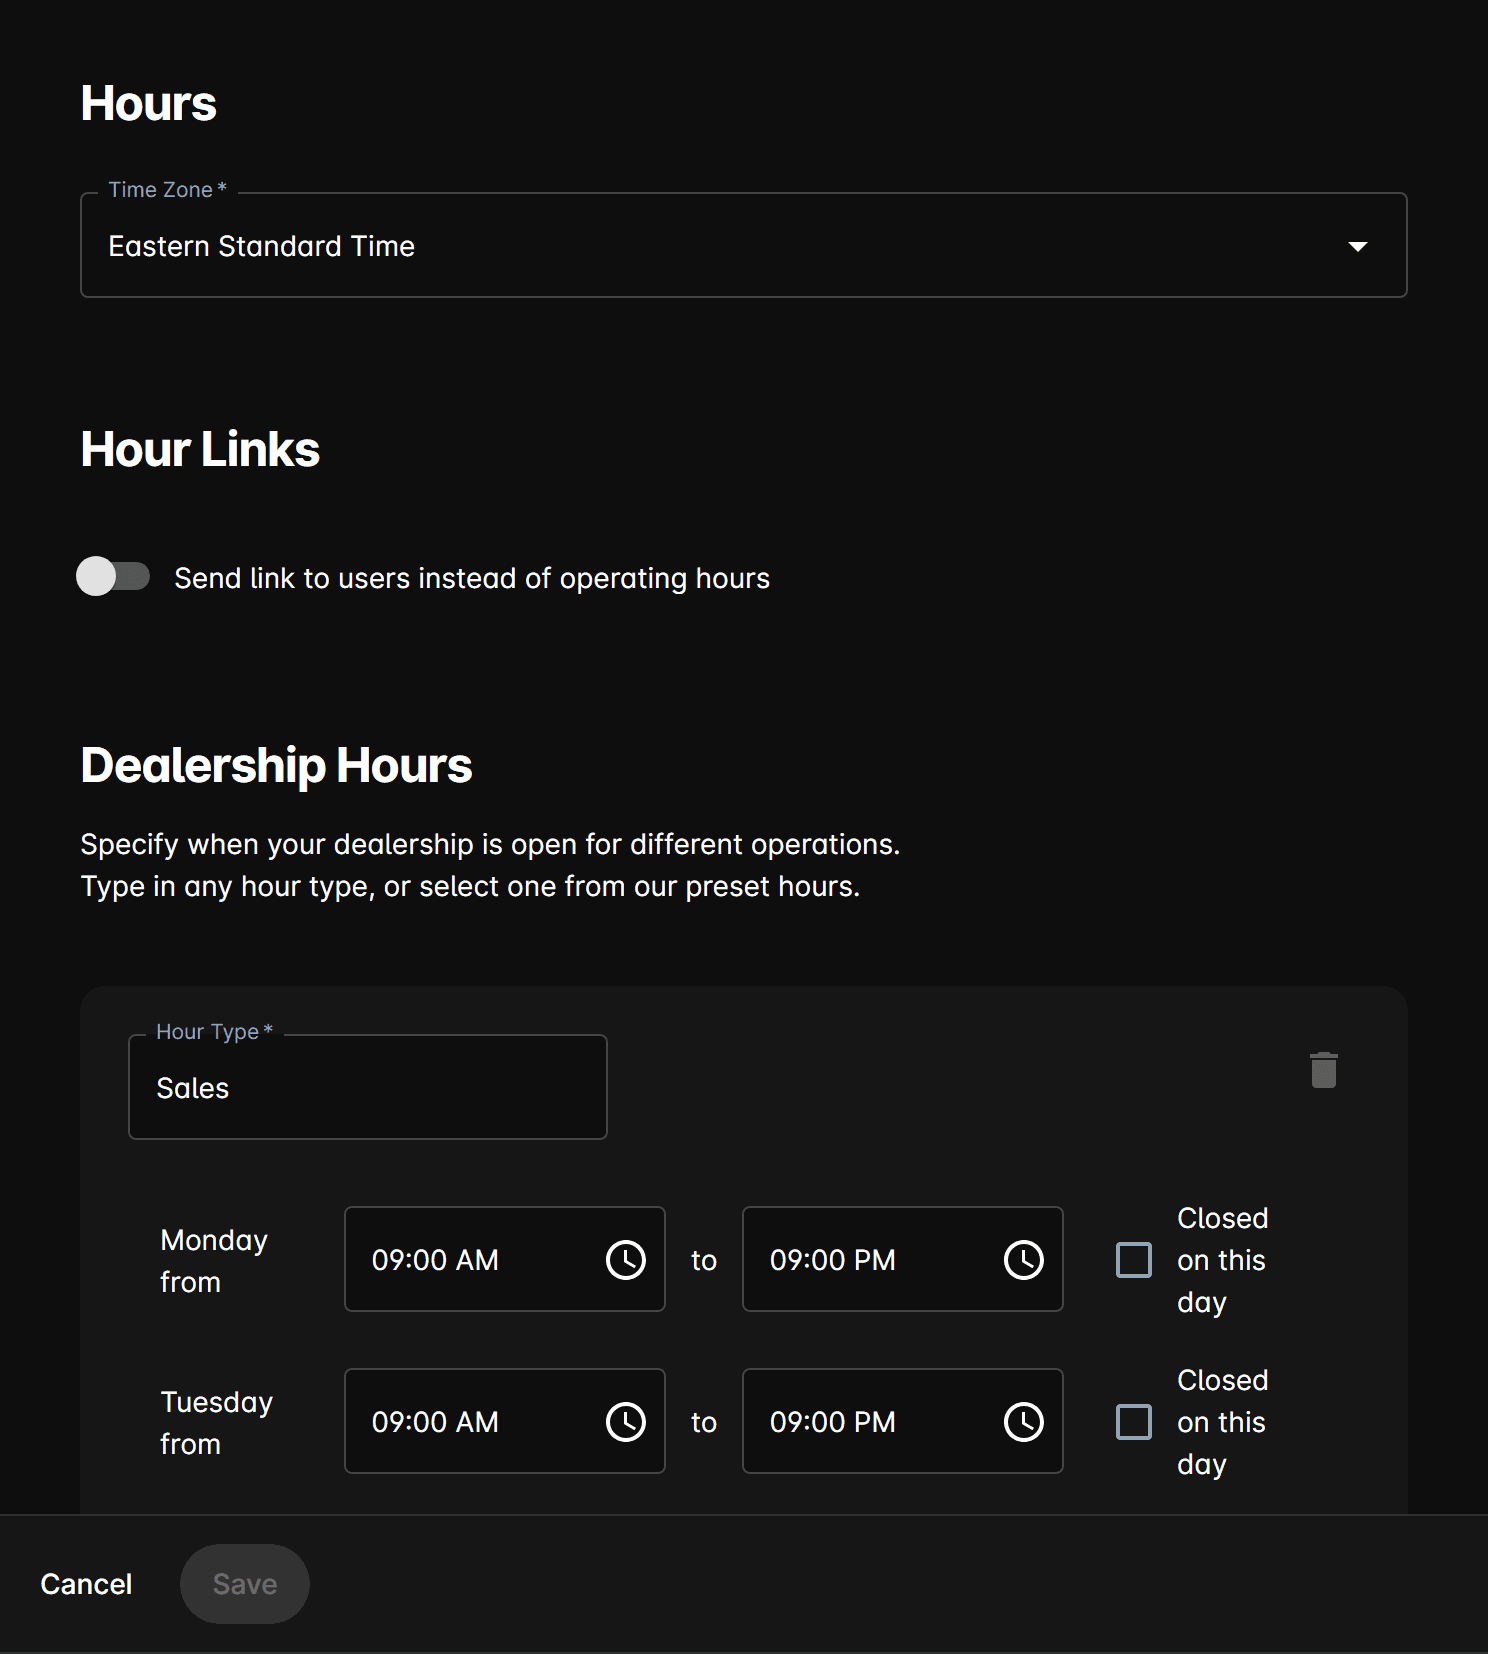
Open the Hours tab and set your Time Zone first — appointment scheduling depends on it.
Each row is a set of hours with a Hour Type label. Four names are offered by default — Sales, Body Shop, Service, and Parts — but the field accepts any name you type, so you can add your own. Click Add Another Hour to create more rows.
For each day, set an open and close time or mark the day closed. The AI only offers appointment slots inside these hours and quotes them when customers ask.
Set hours before enabling appointment booking on your agents — the AI needs accurate hours to offer valid slots. A set of hours can't be deleted while an agent is using it.
For closures like public holidays, see the Holidays guide.
Activate Your Channels
Enable the channels your dealership will use under the corresponding tab:
| Channel | When to enable |
|---|---|
| Webchat | You have the widget embedded (or plan to) on your website |
| SMS | You want to send and receive text messages with customers |
| You want to handle customer email enquiries | |
| Voice | You want the AI to answer and make phone calls |
| Reach | You want automated follow-up and re-engagement (see Step 2) |
The Activation and Features tab holds the master Chatbot Active switch plus feature toggles (supported languages, car comparison, conversation summaries, anti-spam, and more) — see Activation and Features.
Only turn on channels that are fully configured. A channel that's enabled but not finished can leave customers without a reply.
Webchat appearance
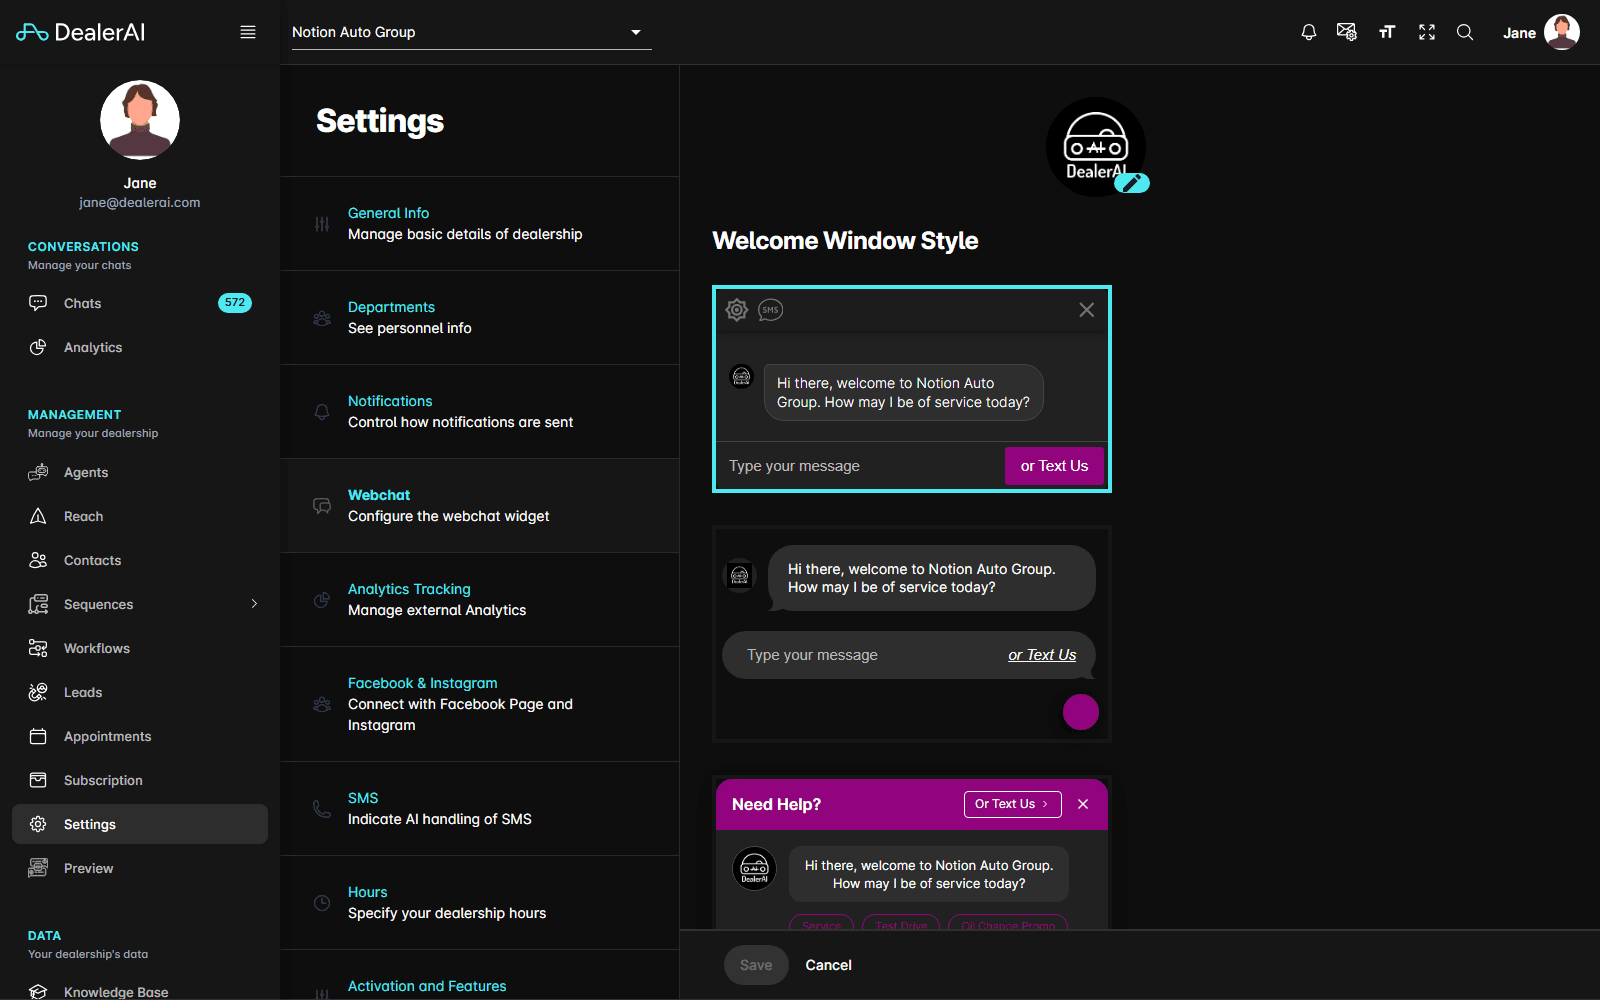
If you're using webchat, set its look on the Webchat tab:
| Setting | Notes |
|---|---|
| Dealer Name | The name shown in the widget header |
| Welcome Messages | The opening message, set per language/locale |
| Accent Color / Text Color | Match your brand |
| Theme Mode | Light or dark |
| Align Right | On places the launcher on the right, off on the left |
Other options on this tab cover auto pop-up delay, idle timing, the chat avatar, action buttons, and the embed script.
Use Preview to try the widget before going live. To embed it on your site, see the Webchat Installation guide.
Step 2 — Configure Reach
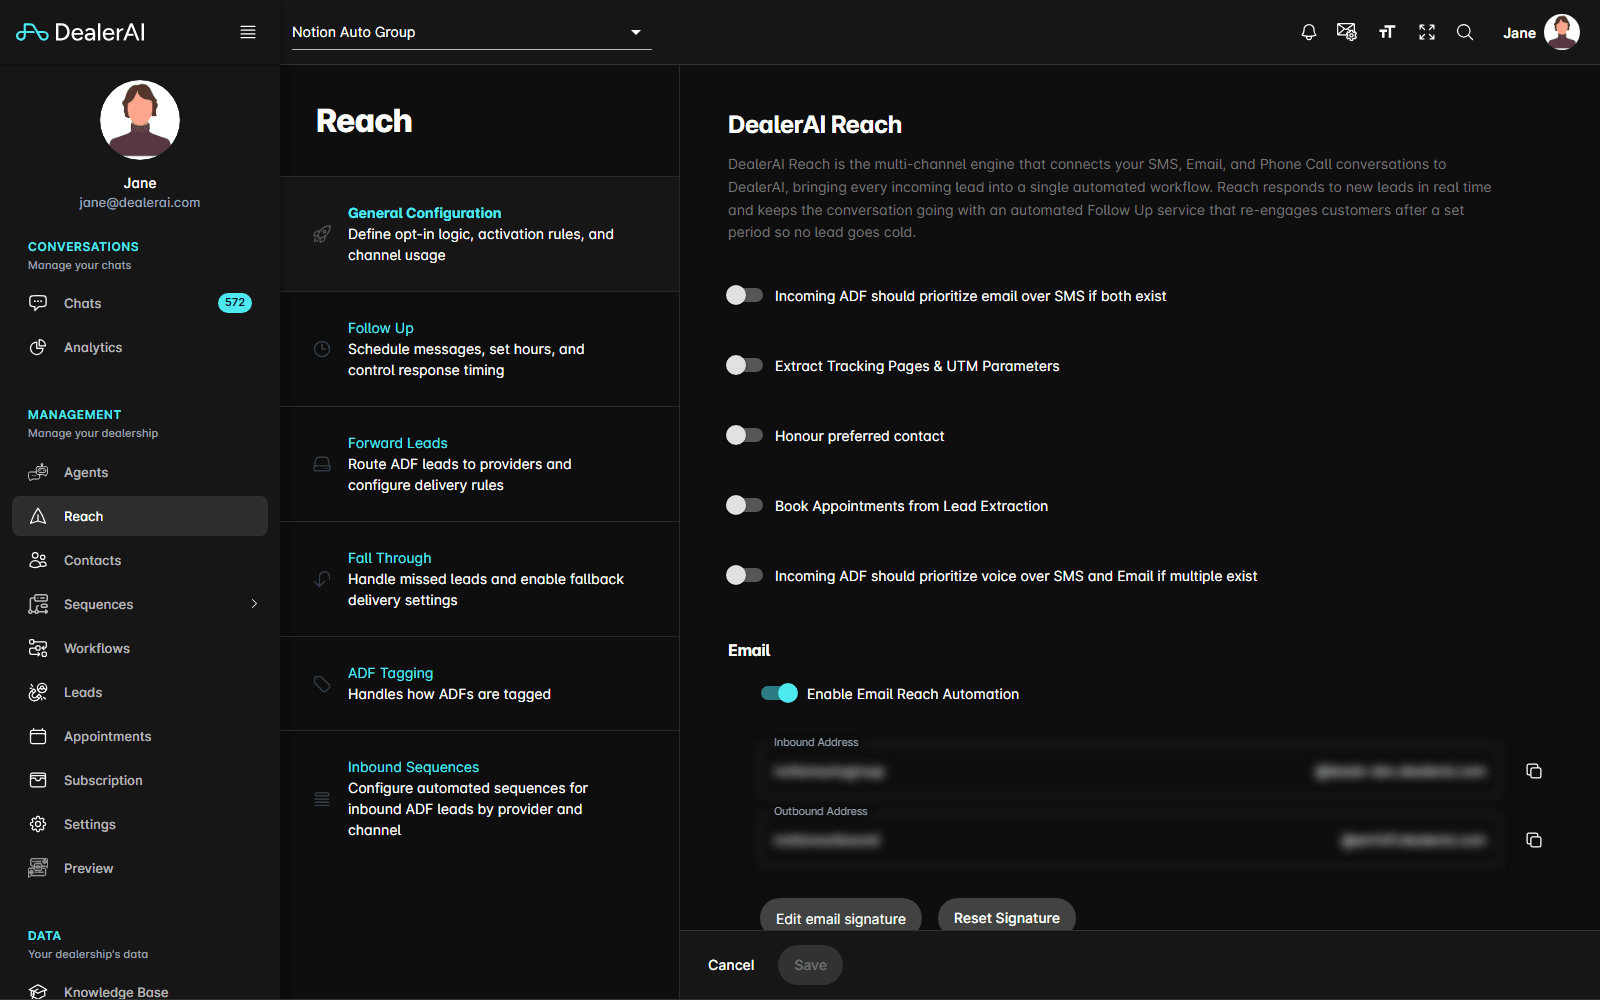
Navigate to Reach in the sidebar. Reach handles lead follow-up so no enquiry goes unanswered, even outside business hours. See the full Reach guide.
General Configuration
This tab decides how inbound leads are handled and which channels Reach may use.
| Setting | What it does |
|---|---|
| Incoming ADF should prioritize email over SMS if both exist | Picks the channel when a lead supplies both |
| Incoming ADF should prioritize voice over SMS and Email | Same choice when voice is enabled |
| Honour preferred contact | Uses the contact method the customer asked for |
| Book Appointments from Lead Extraction | Lets the AI book directly from lead details |
| Enable Email / SMS / Voice Reach Automation | Turns each outbound channel on |
| Email Subject Type | AI Generated, or Preset with a fixed subject line |
The Email section also shows your Inbound Address and Outbound Address (set by DealerAI, with copy buttons) and an Email Signature editor. See Configure email settings.
You can also restrict which leads Reach acts on using Filter ADF Email Sources and Filter ADF by Providers whitelists and blacklists.
Follow Up
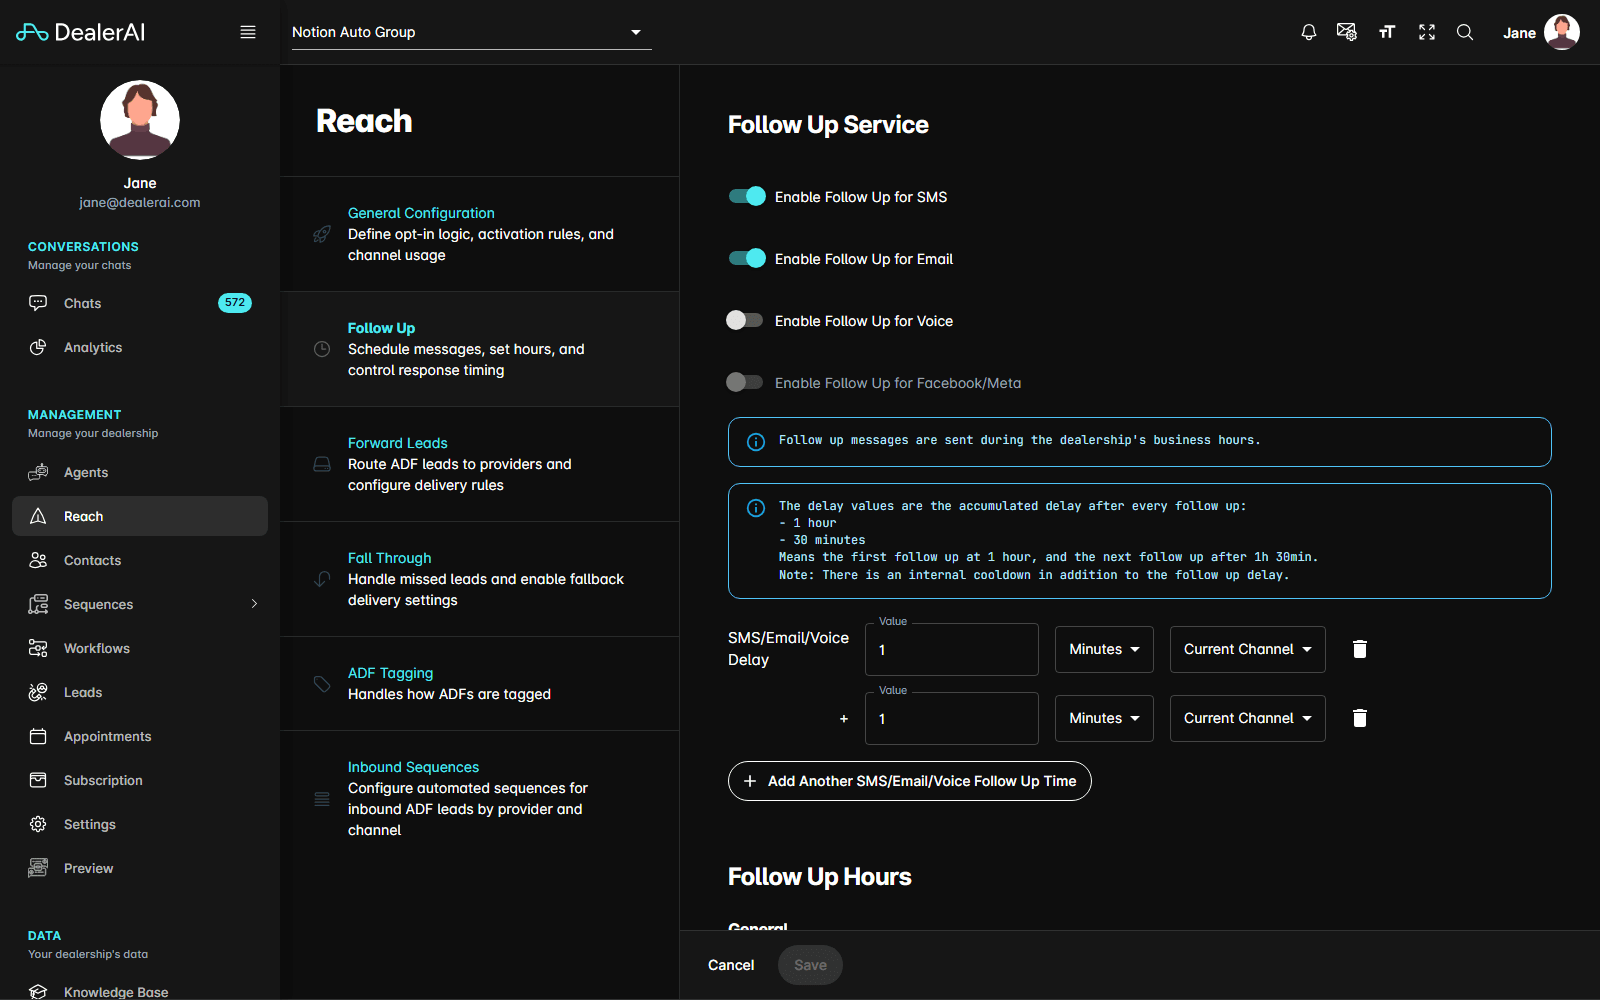
Follow Up chases leads who haven't replied. Turn on the channels you want with the Enable Follow Up for SMS / Email / Voice / Facebook-Meta switches, then set when the attempts go out.
Delays are cumulative — each one counts from the previous attempt, not from the original lead. Facebook/Meta has its own separate delay list.
You don't write the follow-up text here. The message is generated by your AI agent, so shape its wording through the agent prompts.
Forward Leads
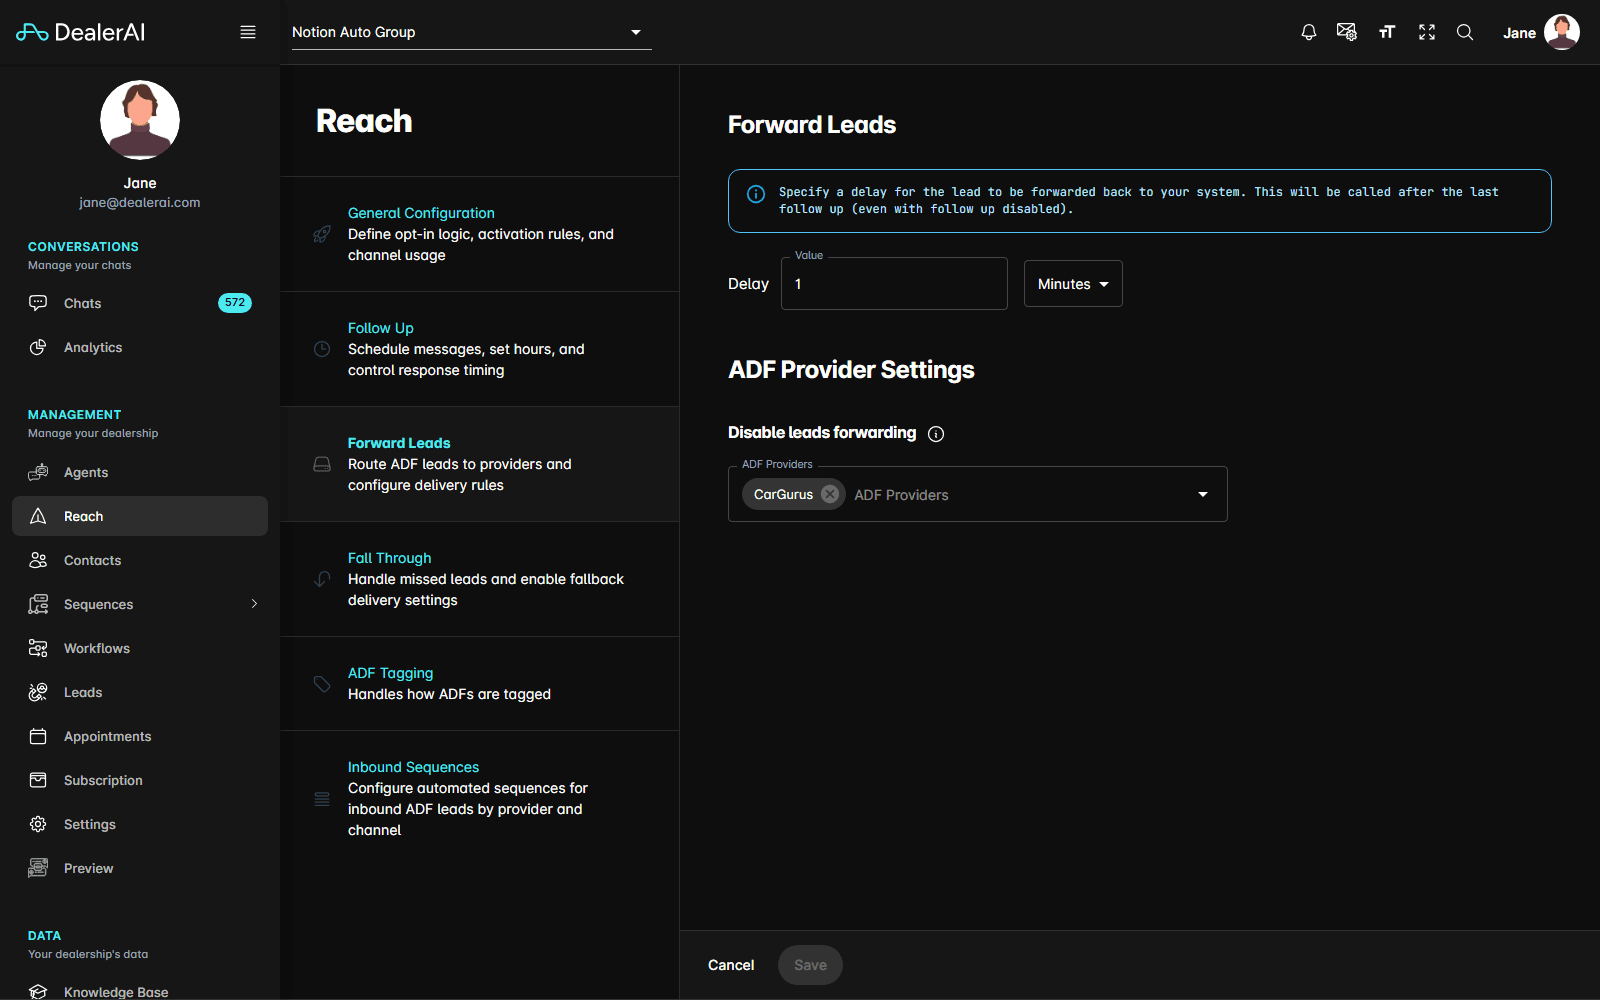
Once Reach has finished following up, the lead is handed back to your own system. This tab sets a Delay (value plus Minutes/Hours/Days) before that happens, and lets you name ADF providers that should be excluded under Disable leads forwarding.
Fall Through
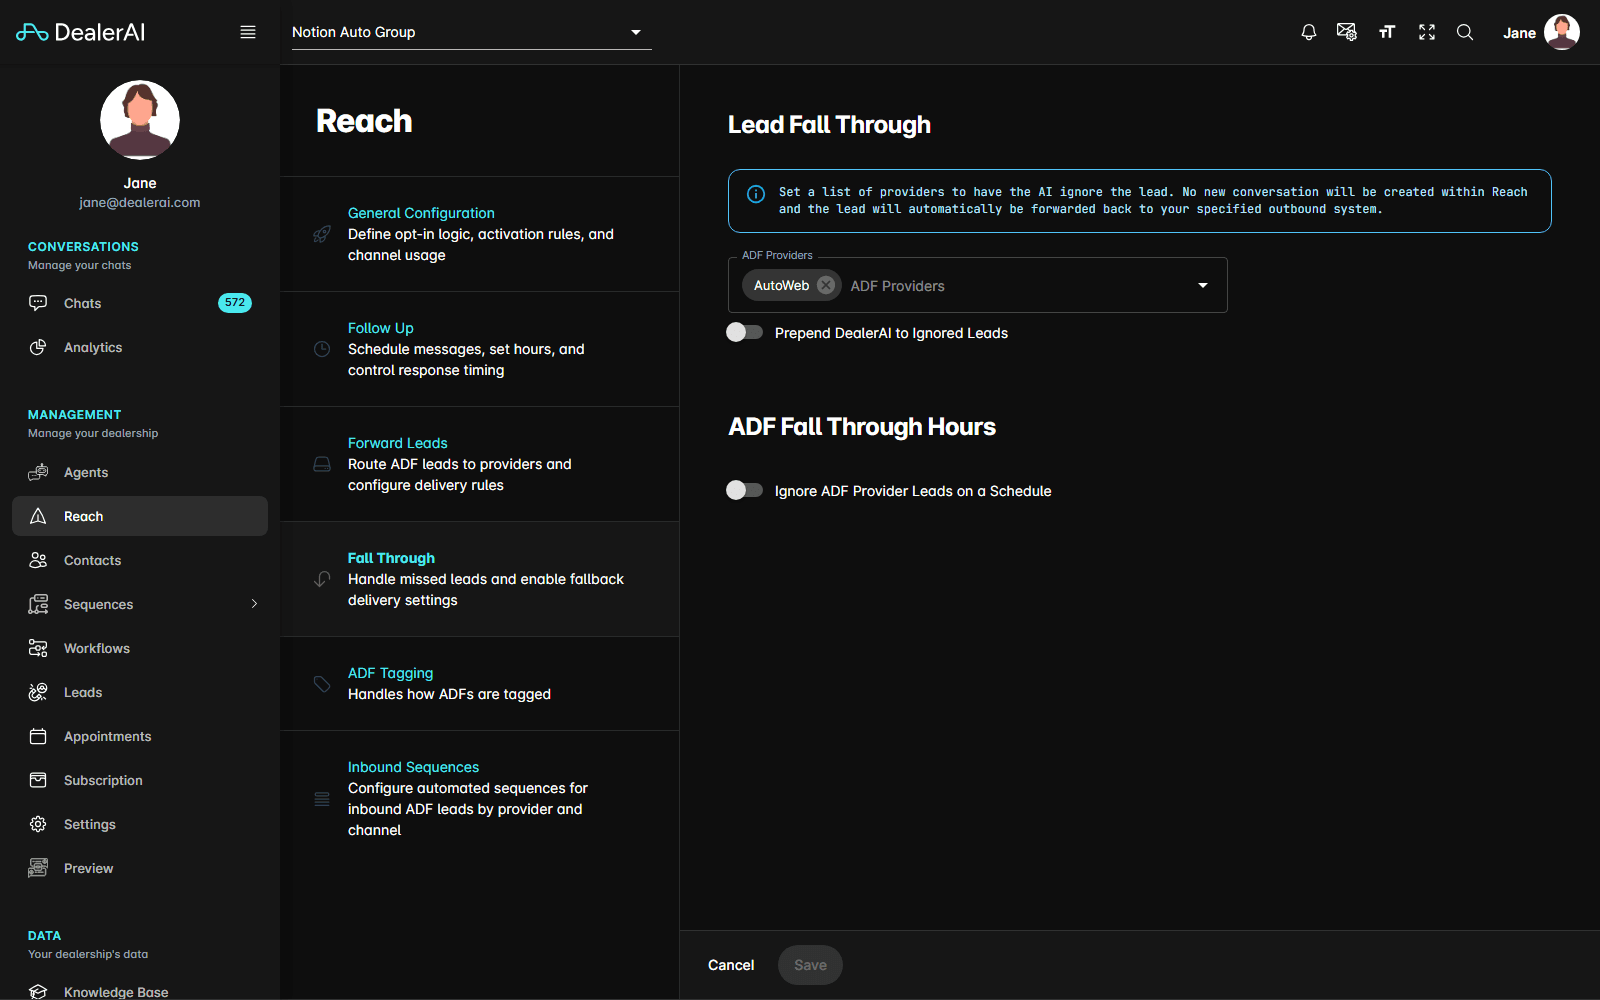
Fall Through names providers the AI should ignore completely. Leads from an ADF Provider in this list get no Reach conversation and pass straight back to your outbound system.
| Setting | What it does |
|---|---|
| ADF Providers | Providers whose leads the AI ignores |
| Prepend DealerAI to Ignored Leads | Marks ignored leads so you can spot them downstream |
| Ignore ADF Provider Leads on a Schedule | Adds ADF Fall Through Hours so leads are only ignored at set times |
What's Next
Once Settings and Reach are configured, continue setting up the rest of your dealership: